Figures#
Objective: Learn to upload and position figures in Overleaf.
Uploading a figure#
Incorporating images and figures into your Overleaf project is best accomplished by creating your figures, particularly graphs and plots, outside of Overleaf and then importing them into Overleaf.
Click on the “upload” icon and navigate to the location of your figure.
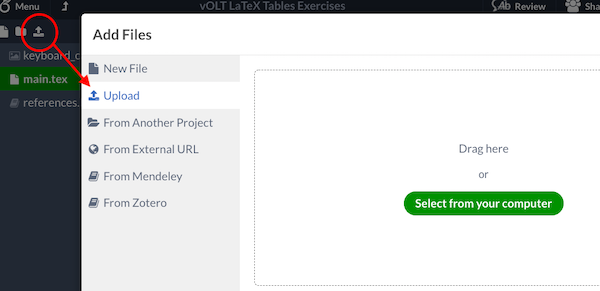
Figure Placement#
Use the following specifiers to adjust the placement of your figures.
Specifier |
Permission |
|---|---|
h |
Place the float here: approximately, not exactly, at the same point it occurs in the source text |
t |
Position at the top of the page |
b |
Position at the bottom of the page |
p |
Put on a special page for floats only |
! |
Override internal parameters LaTeX uses for determining “good” float positions |
H |
Places the float at precisely the location in the LaTeX code. Requires the float package. This is somewhat equivalent to h! |
Exercise 1: Upload a figure#
To upload image, choose an image of your own, or find file at: EPS-Libraries-Berkeley/LaTeX
Download keyboard_cat.png, and upload file to the Overleaf project.
Place image with these commands:
\usepackage{graphicx}
\includegraphics[width=0.4\textwidth]{keyboard_cat}

Exercise 2: Designate figure position#
Use b, t, h to see where figure moves. You might need to add additional text in the document to see how the figure placement varies.
\begin{figure}[b]
\centering
\includegraphics[width=0.6\textwidth]{keyboard_cat}
\end{figure}
Syncing and Uploading figures hosted elsewhere#
Find more information about syncing and hosting your figures outside of Overleaf.
Google Drive: https://www.overleaf.com/help/247-how-can-i-upload-files-from-google-drive#.W4WtwhPwZE5
GitHub/Dropbox: https://www.overleaf.com/help/343#.W4WtgxPwZE4